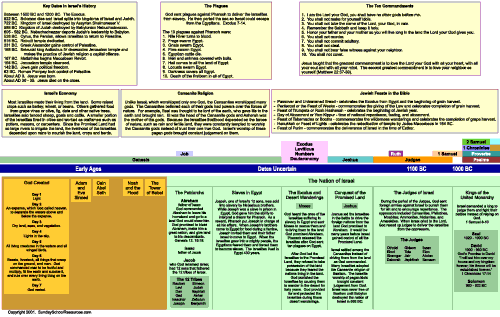
 Putting events on a timeline gives you a sense of how much time goes by in between each event. It also helps you remember just when those important things happened. It is an easy way for students to understand events in the Bible in the correct order and they can also be a lot of fun to make.
Once you have decided that your students would gain tremendous benefit from seeing the progression of events of the Bible in the form of a timeline, the first obstacle that crops up is, "How do we start?" Some of the questions that arise when constructing a timeline are from not knowing what the date increments should be, how far apart they should be spaced, what format should be used and what exactly should go on it.
How to Make a Timeline for Kids- While adult supervision may be required, elementary age kids are capable of doing all the work themselves.
Timelines for Homeschool- Lots of types of timelines examples that you can use.
Parents and grandparents: A big-picture worldview project with your kids- with complete directions and suggestion on how to create the timeline
Biblical Timelines:
Timeline of the Bible- A complete Bible timeline that you can print out. (Click on Detailed Timeline: Print Version)
How do I use a timeline in class?- lesson with activities
Old & New Testament Timelines- Several timelines you can print out.
Bible Timelines Online- contains a series of over 20 free timelines (charts). Even though the typical timeline shows when an event took place these timelines were designed to help in understanding the reasons "Why?" an event happened rather than to show exactly when it happened.
Bible Timeline- A chronological Bible timeline
Time Lines and Chronology- Prophecy and history
Bible Timelines- Scroll down about halfway for this.
Timeline- 4100 B.C.- Present (Also note timeline is a ISMAP and can be clicked on to see in more detail.)
Bible Timeline Printables- Creation, Adam & Eve, The Resurrection. These printable cards are just the right size for making a Bible Timeline. Children can draw in their own pictures or use the ones provided. Then write a short description on the front of each card, and longer descriptions on the back. Print on heavy cardstock paper, cut out and tape across the top of the card. These make wonderful Classroom sized bible timelines for children to enjoy. Additionally, you can use each set separately as a game for children to put them in the correct order.
Bible Timeline Card Game- Print and play (2 different versions)
Which came first? (file folder game)- When this question is asked, most people think of the chicken or the egg. Here is a game that wants to know which Bible story came first. In this game players are asked which story appeared first in the Bible as they make their way around the board. The first player to FINISH wins. (You can also use this game to review what happened in the correct order of a certain Bible story or several of your own choosing. Just write up questions about key events in the story and play the game.)
From Creation to Joseph Cards- Use these cards for Memory, Go Fish, or sequencing. You can also play Bible Timeline Card Game with the cards.
Birth of Jesus to Ascension Cards- Play Memory, Go Fish, or sequencing with these cards. These cards can also help students establish the content and order of the Matthew, Mark and Luke (synoptic) gospels. Example: Take the gospel of Mark since it's the shortest and ask the students to take the cards and put them in the order which Mark mentions them in his book. You can also play Bible Timeline Card Game with the cards.
Timeline Templates:
Timeline- Word template
How to Make a Timeline Template With Microsoft Word
Timeline Generator- Horizontal or vertical timelines (only up to 6 events). Great to review events in a story.

Copyright Laura Grace 2009
About the Author

Laura Grace
Laura Grace was a special education teacher years ago and has taught CCD for 16 years. She has been a contributor at catholicmom.com since 2006, is part of the Gospel Reflections Team, and creates lesson plans for religious education and homeschooling. In 2008 Laura started her own blog, The Catholic Toolbox where she posts activities, crafts, games, worksheets, puzzles, lesson plans, classroom tips, etc. for all ages.


.png?width=1806&height=731&name=CatholicMom_hcfm_logo1_pos_871c_2728c%20(002).png)
Comments