 Red Cross–inspired Appliqué Pocket Pillow
Yesterday, we featured the terrific book A Homemade Year: The Blessings of Cooking, Crafting, and Coming Together by Jerusalem Greer. Today, I'm thrilled to share a uniquely beautiful homemade craft, pulled directly from Jerusalem's book! We hope you check out this terrific resource for your family! LMH
Red Cross–inspired Appliqué Pocket Pillow
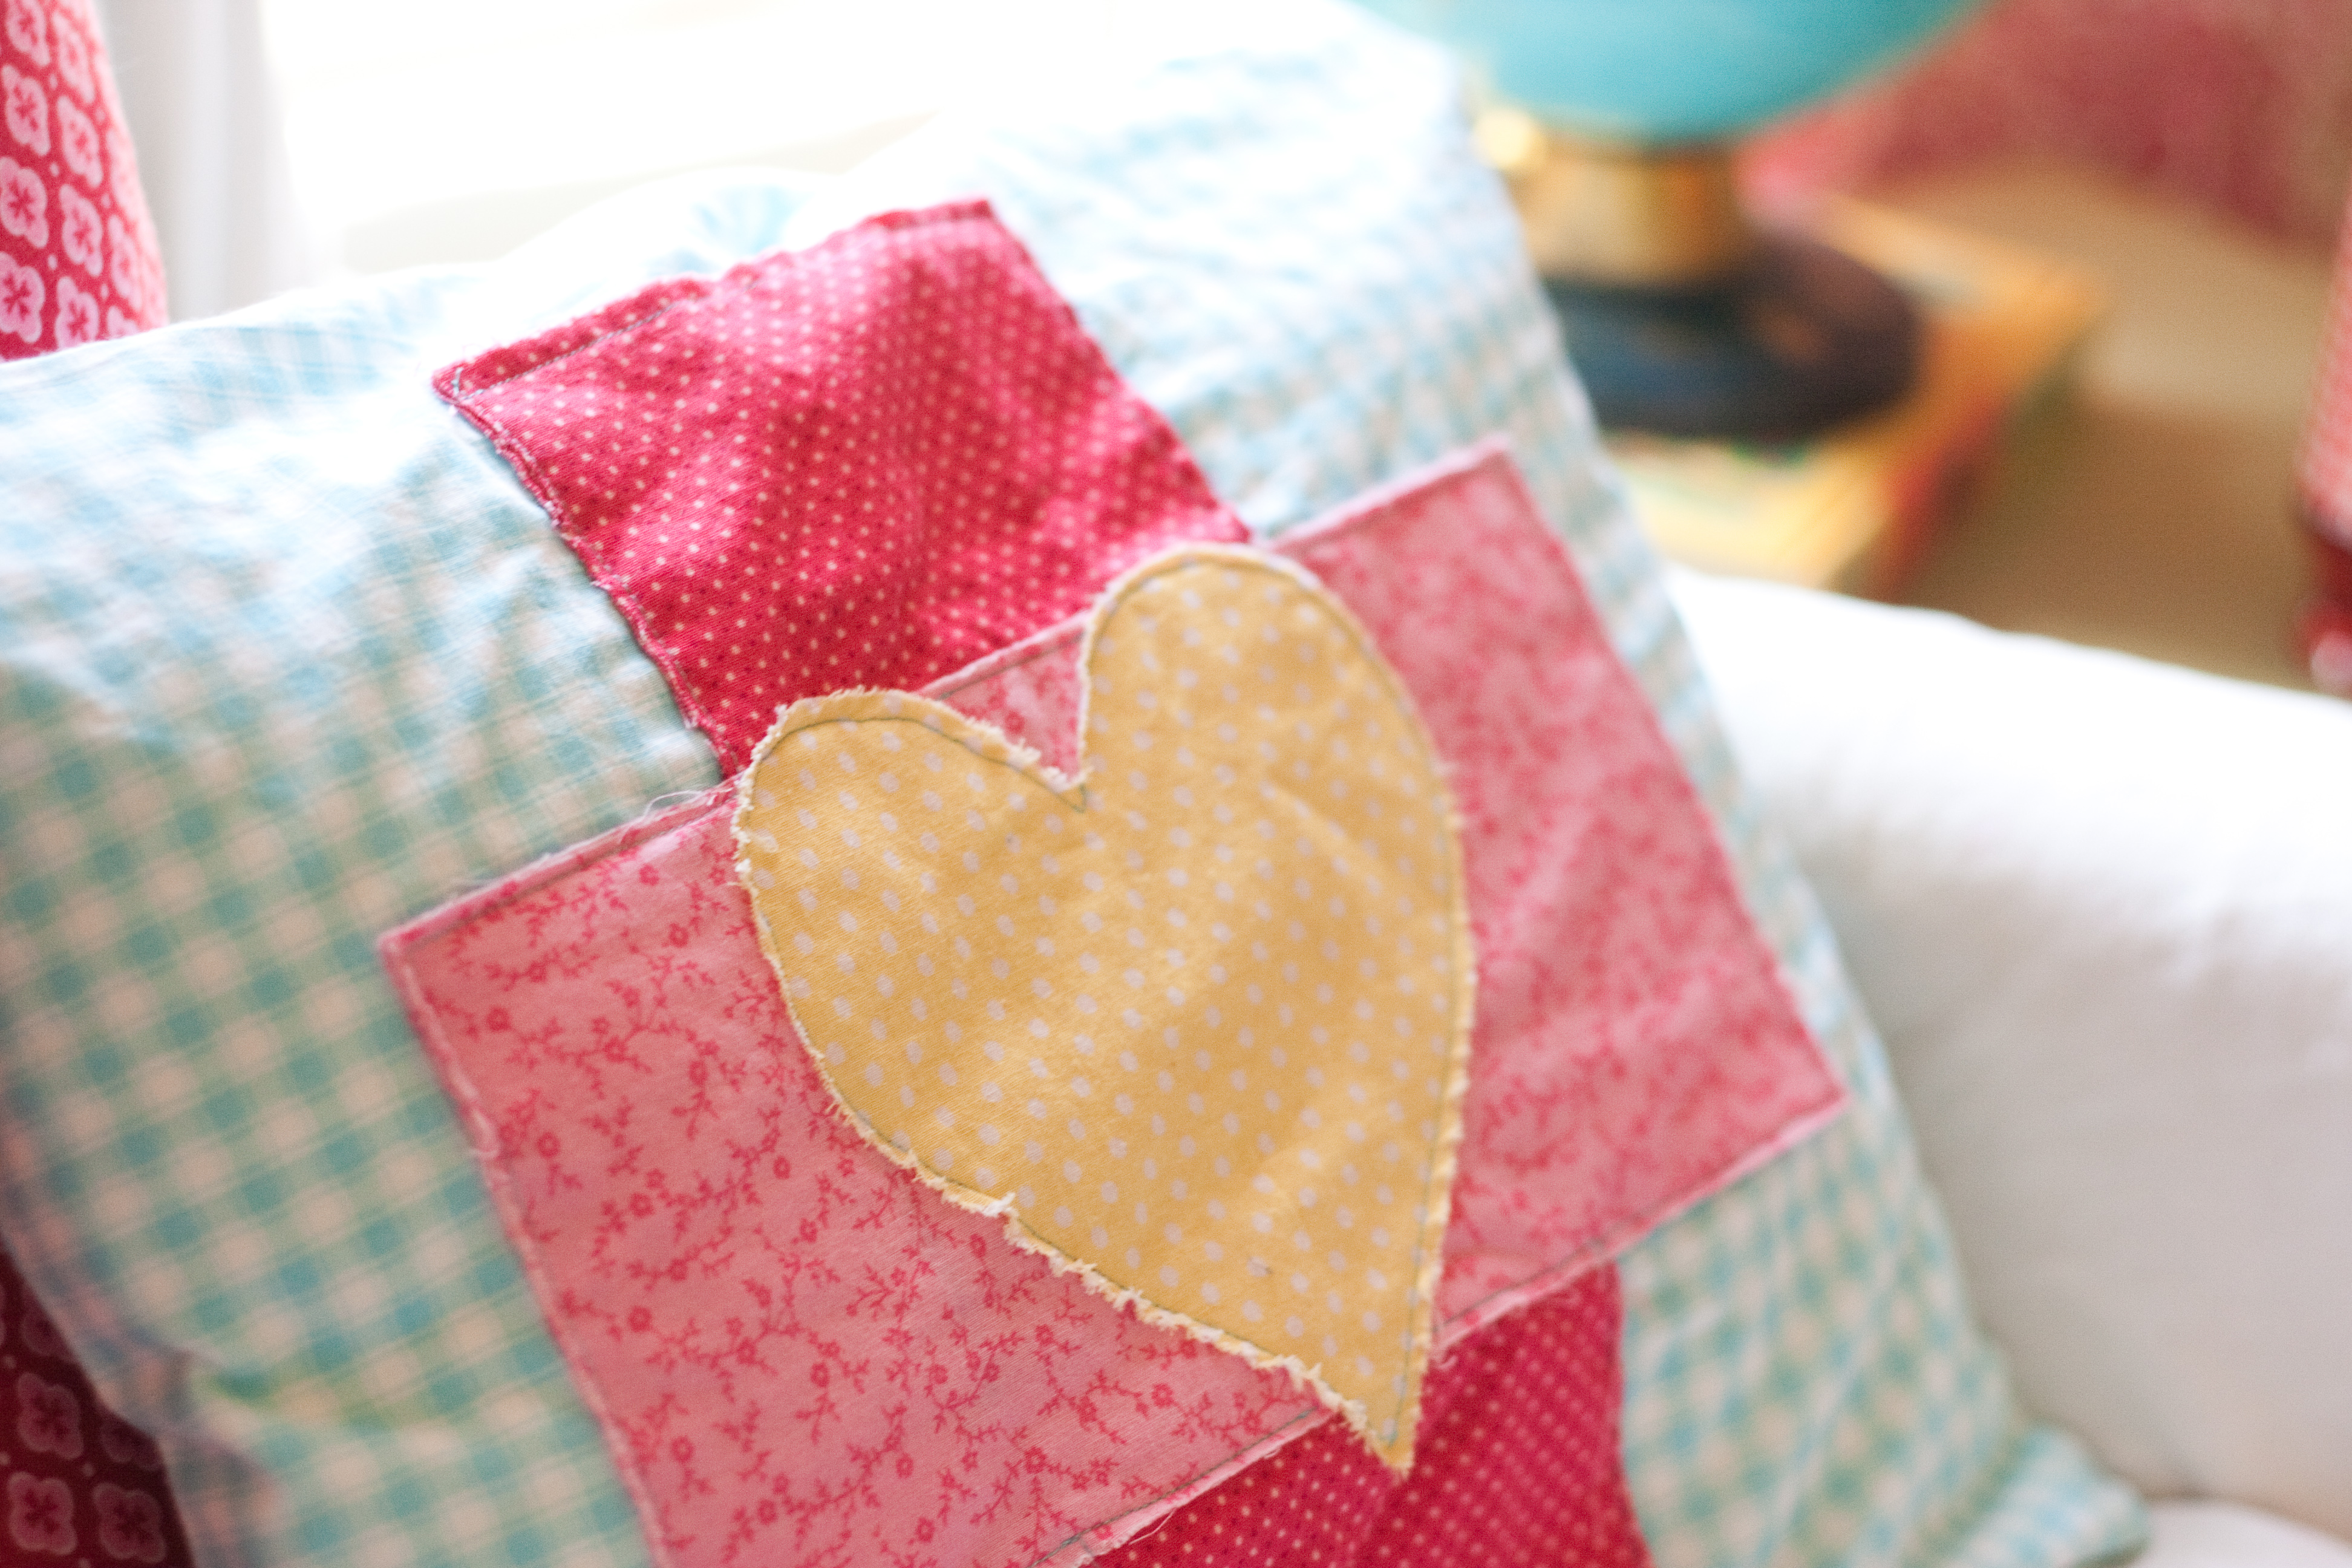
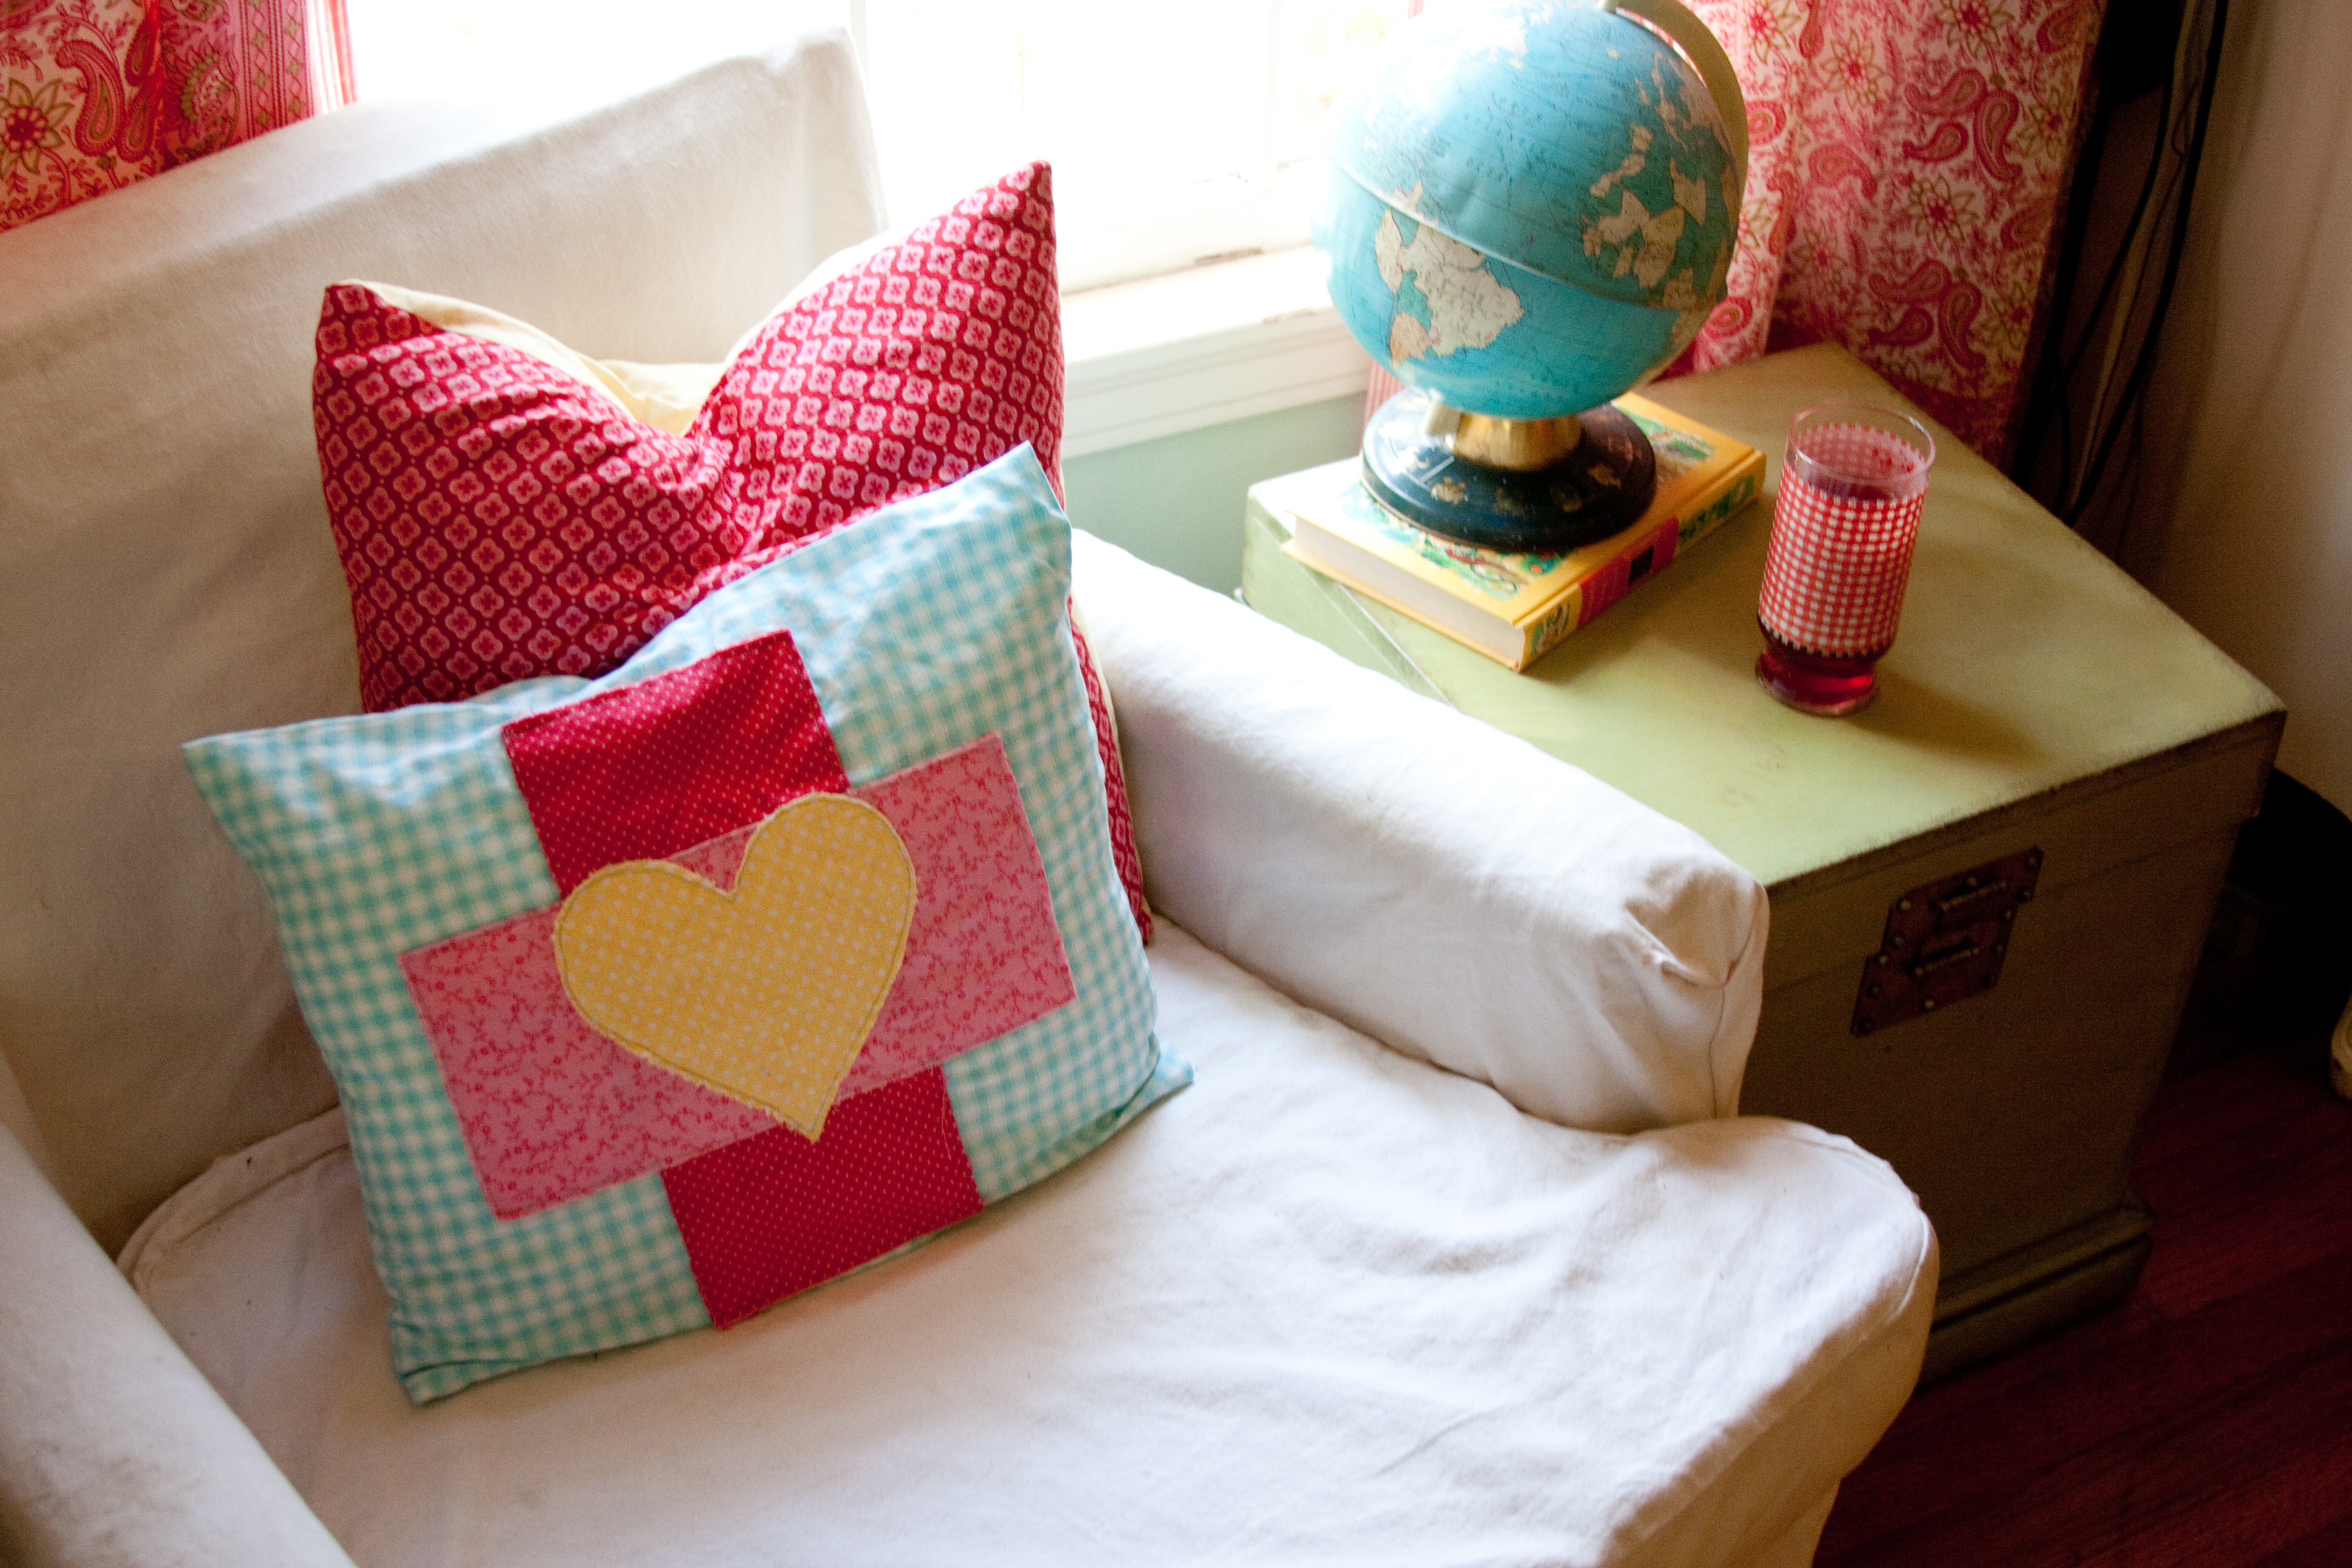
American pioneer Clara Barton started the American Red Cross in 1881 after she witnessed the good works being done by the Swiss-inspired International Red Cross. Having served in the Civil War, Barton was acutely aware of the needs that war creates, both during and after the fighting has ended. The Red Cross symbol that we are all familiar with now was created so that Red Cross workers could identify themselves in hostile areas, sending a beacon of hope and help. This pillow can also be made as a gift to give to those who may need a reminder that they are not alone. The edges of the cross are frayed as a symbol that Christ does not ask that we come to him tidy and neat, perfectly pressed and finished; but that he wants us to come, just as we are, messy and lost, tattered and worn.
Materials Needed
Main piece of fabric (I chose aqua gingham.)
Contrasting fabrics in three colors (I chose a yellow polka-dot, a pink floral, and a red pin dot.)
Pillow insert
Thread
Sewing machine
Straight pins
Hot iron
 Red Cross–inspired Appliqué Pocket Pillow
Directions
Begin by washing, drying, and ironing all your fabrics.
Next, cut the pillow fabric to measure 19 x 39 inches.
Cut Rectangle B out of the lighter color strip, measuring 5 x 11 inches.
Cut Rectangle A out of the darker strip, measuring 5 x 11½ inches.
Download pattern for heart here
Creating the Appliqué
Lay the pillow fabric out lengthwise, right side down.
Fold the left side in 13 inches, press with iron, then open.
Repeat this on the right side, remembering to open after ironing.
This should create 3 13-inch sections, denoted by the pressed creases.
(The middle section will be the front of the pillow.)
Flip fabric right side up.
Center Rectangle A in the middle 13-inch section, horizontally.
Pin and topstitch 1/8 inch from raw edge on all 4 sides.
Lay Rectangle B on top of Rectangle A, vertically.
Pin and topstitch 1/8 inch from raw edge on all 4 sides.
Center heart sideways on the crossed rectangle, the top of the heart pointing to the left edge and the bottom pointing to the right edge.
Pin and topstitch 1/8 inch from raw edge. Remember you are leaving the edges of the heart raw.
For the Pillow Construction
Flip fabric wrong side up (your cross will now be face down).
Fold left edge in 2 inches, press, fold in 2 more inches, and press.
Do the same on the right side.
Stitch left fold down with 1½-inch seam allowance from outside edge.
Repeat on right fold.
Flip fabric right side up, heart cross facing up.
Fold right section in 9 inches (this will follow the original 13-inch crease).
Fold left section in 9 inches as well, overlapping the right section by 5 inches.
Pin and stitch the open ends with ½-inch seam allowance.
Turn your pillow sham inside out and insert pillow form.
Activity from A Homemade Year: The Blessings of Cooking, Crafting, and Coming Together
by Jerusalem Jackson Greer
©2013 by Jerusalem Jackson Greer, images by Judea Jackson
Used by permission of Paraclete Press, www.paracletepress.com
About the Author


Comments