
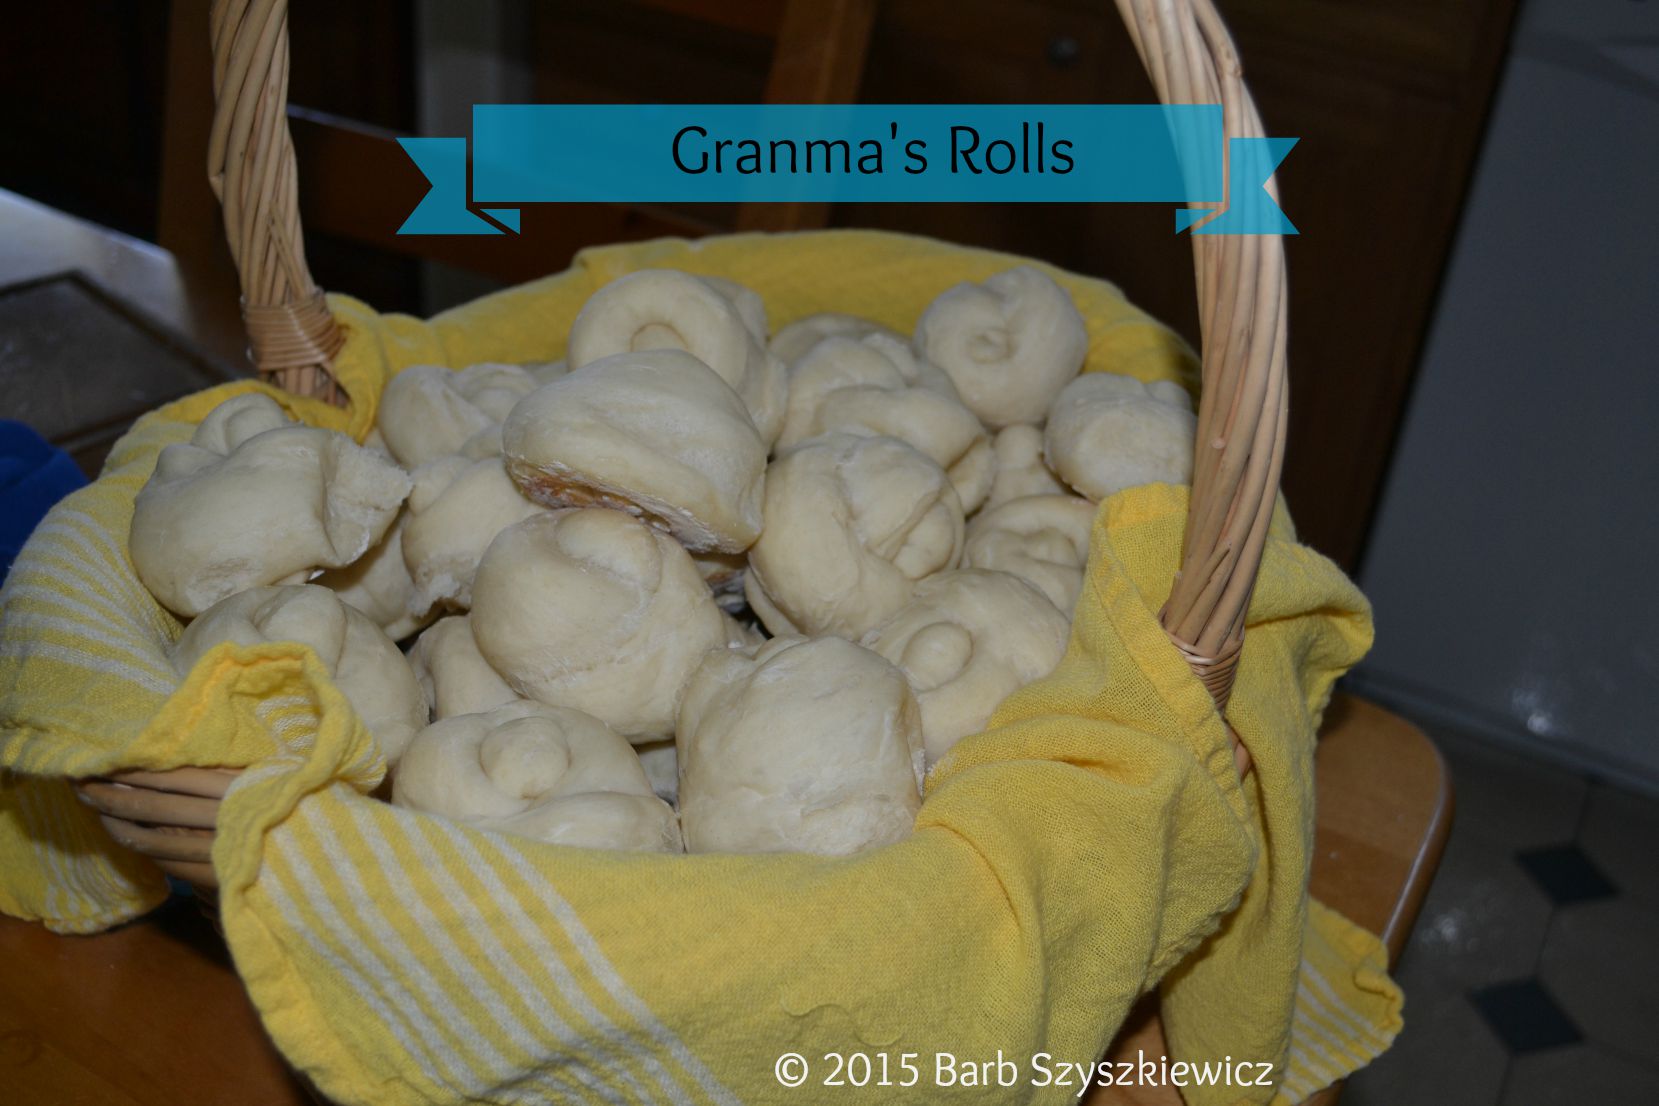
My paternal grandmother was famous for her home-baked rolls. Despite arthritis in her hands, she would bake huge batches of these for special occasions. Granma did the whole thing by hand–no stand mixer for her! (For that matter, I don’t think she owned measuring cups or spoons, either.) Here’s how to make a batch of approximately 24 rolls. Go ahead and double it if you're feeding more than 10 people; as kids, my cousins and I used to have contests to see who could eat the most rolls at Thanksgiving dinner. These directions are for beginners who've never made yeast bread before--I promise, it's not complicated!
GRANMA’S ROLLS
Makes 24 rolls
2 1/4 cups milk
1 TBL vegetable shortening
2 TBL sugar
1 TBL yeast
2 tsp salt
5 to 6 cups all-purpose flour
In a heavy-bottomed pot, heat the milk, shortening and sugar. Make sure you do not bring it to a boil; just heat it enough to melt the shortening. Then allow it to cool until you can put your finger into the mixture and it doesn’t feel too hot. (You want this to be “baby-bottle warm.”)
Pour it into the bowl of your stand mixer. Sprinkle in the yeast and stir. Then wait.
After 3 to 5 minutes it will be nice and bubbly and you'll know it's ready for the next step.
Begin to add flour, 1/2 cup at a time. After adding about a cup of flour, add the salt. You can mix the salt in with some of the flour if you like. Mix on low speed.
After about 3 cups of flour are added, add the rest very gradually.
You want the dough ball to climb the hook and begin to pull away from the sides of the bowl. If it doesn’t yet do this, slowly add more flour.
Be very careful adding flour now, because there is a fine line between “enough flour” and “a little too much” and once you cross it, there’s no going back.
Brush a large bowl with some vegetable oil.
Place the dough in the bowl, then flip the dough over with your hands so the top of the dough ball is oiled as well.
Cover with a tea towel and let it rise about 1 hour.
Flour your work surface. I have a dollar-store sugar shaker that I keep full of all-purpose flour, just for this. Also sprinkle flour on your baking pans. For this recipe, you’ll need 1 heavy cookie sheet.
Now for the fun part. Make a fist and give the dough a good punch.
Dump the dough onto your floured surface. Knead by folding the dough over and then pushing on it with the heel of your hand. Then turn it 1/4 turn and repeat.
Shape the dough into a long log and divide in half.
A bench scraper is really useful for this, but you can use a pancake spatula to do the job.
Then start dividing the dough into smaller sections.
Roll each section into a thin strip about 6 inches long.
Then twist it into a knot.
Line them up on a floured baking sheet (about 24 rolls will fit on a baking sheet.)
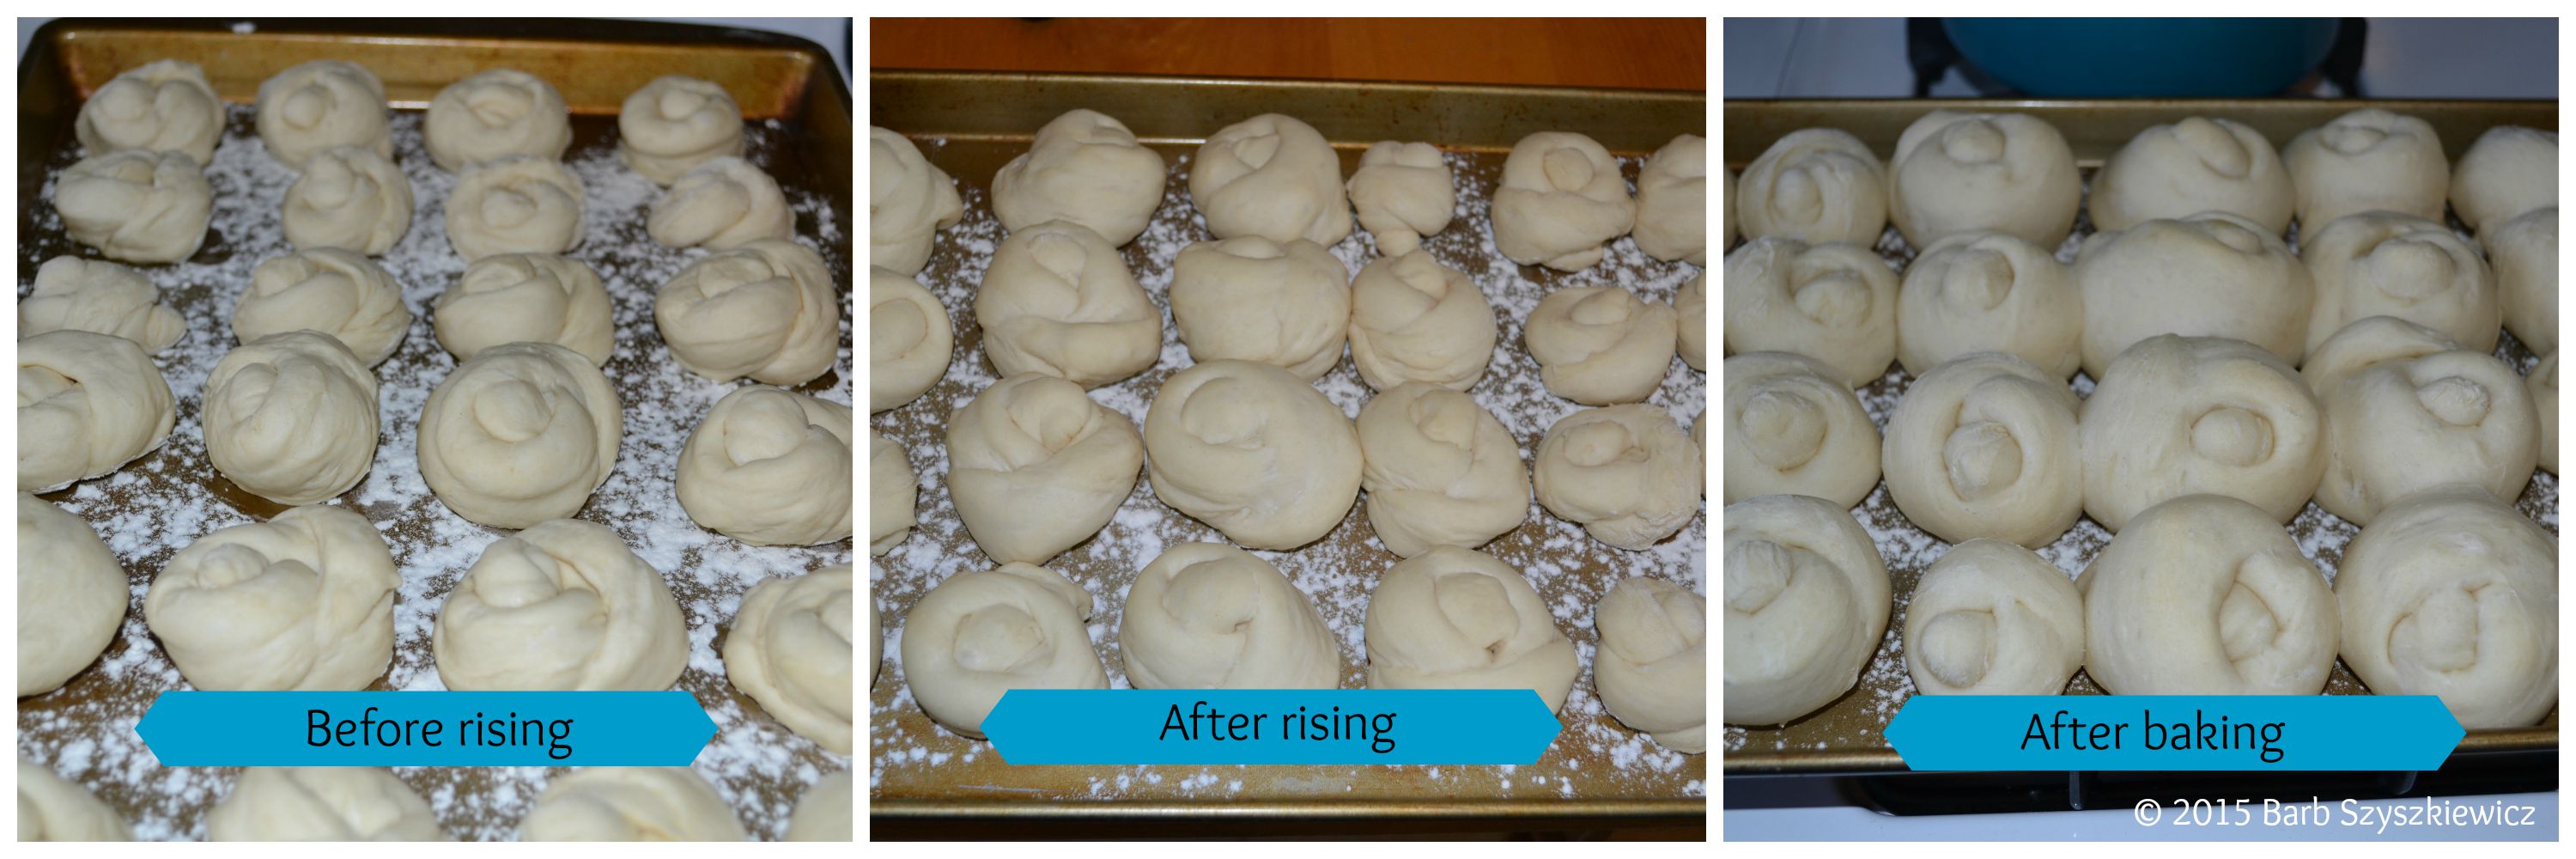
When the pan is full, cover it with a tea towel and let it rise about another hour. A little more won’t matter; you have about 20 minutes leeway here.
Bake at 350 for 12 to 15 minutes. You do not want the rolls to turn golden brown on top. They will puff up more while you bake them, as you can see from the photos above.
These rolls don’t keep, so they need to be made the day you intend to use them.
Copyright 2015 Barb Szyszkiewicz, OFS.
Photos copyright 2015 Barb Szyszkiewicz, OFS. All rights reserved.
About the Author


Comments