Photos can work wonders for your blog or website. The simplest site with fantastic photography can take your breath way. However, a stunning design can be destroyed with just a few poorly displayed or photographed images. So, you can do your site some big favors by learning a few tips for taking great web-geared photos!
The following tips will help you take great photos for your website or blog.
Camera
 Simple! Know your camera! Read the manual. Use the best camera available to you, but know that most cameras can take very good photos, as long as you know what it can (and can’t do).
Learn about your camera’s settings. Use a tripod if you have one.
Shutter Speed:
Shutter speed is the amount of time that the shutter is open and is measured in seconds. The bigger the denominator the faster the speed (ie 1/1000 is much faster than 1/25). It is displayed as a fraction of seconds.
Shutter speed is key when shooting action shots. A slow shutter speed (say 1 second) would be used in very low light situations, for special effects or when you are wanting to catch some motion in your photography, like a moving car or your son running across the yard in blurred motion.
A fast shutter speed (like 1/1000) will ‘freeze’ motion. This is helpful when shooting sporting events or your daughter jumping in mid air!
ThePioneerWoman.com also has a great series of posts on Aperture and Shutter Speed that you might enjoy.
Aperture:
Aperture is the diameter of the opening in the lens that allows the light to enter the camera. The bigger the opening, the more light is allowed to enter your camera.
Aperture is measured in f-stops. Larger numbers (f8, f11, f16, etc.) mean smaller openings and less light, whereas smaller numbers (f2.8, f4, etc.) actually let in more light.
If you want a very shallow depth of field (background blurry), you’d choose a very large aperture opening, which would be a very low number. (f2.8) If you want a very large depth of field (everything in focus), you’d choose a very small aperture opening, which would be a higher number. (like f22)
Don't forget ThePioneerWoman.com’s photography posts on aperture. Great for beginners!
Here is a link to a Glossary of Photographic Terms that might be helpful to you, if you really like to get into the details.
Subject
Are you taking photos of people, or of a object? You will approach each differently.
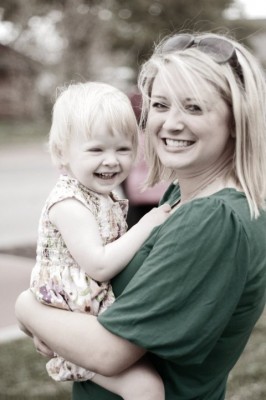
When your subject is a person, you will want to use a close-up shot. Focus on their face, or the upper part of their body. Be sure that the individual wears solid, or subtly textured clothing. Nothing obnoxious or distracting. You want the attention drawn to the person, not their funky hat or red polka-dotted dress.
Are you taking photos of a child? Get down on her level. Is she having a hard time smiling? Trying carrying on a conversation about something she likes, or make some animal sounds and have her tell you what animal she hears (I’ve seen this work well with my own children!). Or don’t worry about the smile. Just have them look at something in the distance. Sometimes pensive shots can be very powerful!
Are you taking photos of items that you are trying to feature on your site? Consider lighting and background carefully. While some might want to hand off product photography to a pro, who has the supplies the make the job a bit easier, you can do it.
Many products can be photographed outside rather well. Choose morning or afternoon light, or an overcast day for best results. Use a sheet, a poster board or other neutral background. Choose your angle to display your object in its best light, and don’t be afraid to get close up. This is where a good lens will come in handy.
Here is a good link the might help you with product photography.
Lighting
I always recommend natural light. Almost everything looks better without the harsh light of a flash. Choose morning, late afternoon or overcast clouds for good, muted light.
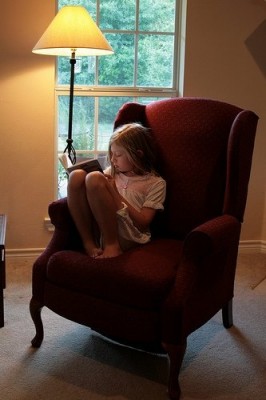
You can also shoot indoors, using a nice open window or doorway. Turn off your auto-flash. Avoid having your subject face into the sun. The lighting will be too bright, and not many people can smile naturally while squinting!
Background
Be sure that you do not have any distracting objects in the background of your photo. You don’t need the background to be complete void of action, but make sure you look at the details closely.
Indoors, be sure that surfaces are relatively neat and uncluttered. Outdoors, be aware of reflections, power lines, and other distracting elements.
Make sure there are no components in the background that will distract from your photo. If your photo is of your store inside, make sure the overflowing trash can is out of sight.
On outdoor shots, be aware of power lines, reflections in glass, and other unsightly elements. Also, watch our for objects “growing” out of your subject’s head, such as trees or sign posts. :)
Perspective
Sometimes changing your perspective can make an ordinary occasion look amazing.
Instead of photographing your child sitting at the table eating dinner, get up close and capture her little hand griping the spoon. A photo of your husband? Instead of a smiling headshot (which most men hate) capture him reading the paper or working in the yard.
Shoot from the side or from very close up. Get a little creative and you might be amazed with what you come up with!
Editing
Does your image need editing? Many do. There are several free online photo editing resources out there for you. But, before you start cropping, sharpening, and retouching, be sure that your photo really needs help.
An overly edited photo takes away from the subject and leaves the viewer wondering why the subject looks like it’s sitting on the surface of Mars or was discovered in your grandmother's attic trunk.
Stay away from ultra-trendy effects. Simple brightening, edge shadows, and contrast can be helpful. But some of the more artistic effects might be better saved for your personal images.
Extra Tips:
- Take LOTS of photos! The digital camera has given us the freedom to take tons of photos and the choose the best of the bunch.
- Try unusual angels and settings. Try a photo of someone standing in an old doorway. Find an old brick wall. Photograph your subject from above. Place your object on an old worn out piece of wood or your grandmother’s table cloth. Be creative!
Extra Resources:
Hope this helps! Bring on the awesome photos!
Copyright 2012 Lauren Gulde
About the Author

Guest
We welcome guest contributors who graciously volunteer their writing for our readers. Please support our guest writers by visiting their sites, purchasing their work, and leaving comments to thank them for sharing their gifts here on CatholicMom.com. To inquire about serving as a guest contributor, contact editor@CatholicMom.com.


.png?width=1806&height=731&name=CatholicMom_hcfm_logo1_pos_871c_2728c%20(002).png)
Comments