 In my February 7 column, Starting Seeds Part 1, I talked about how to get started planting seeds indoor. I mentioned timing, containers and potting mix, light, temperature, and watering. Let’s continue with the care of seedlings after germination has taken place and the first two leaves, called cotyledons, have emerged. Your plastic covering is now removed from the trays.
(If you seeded singly in separate peat pots, you have already accomplished the following step and can skip the next two paragraphs.)
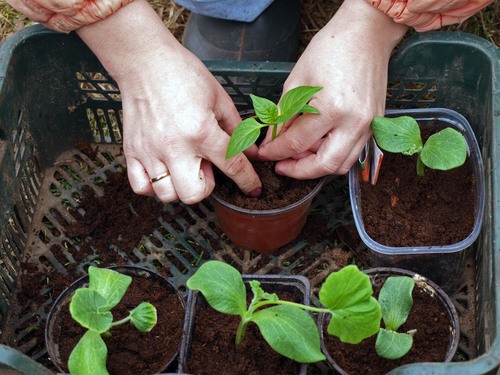
When three to four true leaves are showing it’s time to transplant into individual pots. Fiber pots are best or you can make your own from black-ink newspaper: using a 6 oz. tomato paste can, wrap a folded over piece of newspaper that is two inches taller than the can around it, tuck under the 2” surplus and press can down on table to crease it. Remove can.
Fill with moistened (not soggy!) potting mix and line up so sides of pots touch as they stand in waterproof tray, used to protect surfaces. Press a hole in the center of soil for seedling. Use a small flexible metal spatula to remove seedlings from growing tray. Holding them by their leaves gently tease away one plant from other seedlings and plant into pots. Lightly water to set soil around their tiny roots.
You can now use a liquid fertilizer; dilute it twice as much as instructed and use it half as often. Too much fertilizing at this stage and you could burn the plants, but more likely they will grow too fast and become weak and spindly.
Be careful about humidity and watering while seedlings mature. It is at this stage that most new gardeners fail. Too much water and roots will rot, too much misting and humidity and fungal diseases form.
If you are using paper or peat pots, gauge wetness by looking at the sides of the pots; they will be dark from moisture. Water when soil dries out an inch from the top. I use a Popsicle stick to pull soil slightly to side to check the moistness. Remember that pots in the center of the tray will remain wetter than those at the edges. Pots closer to a window will dry out faster than those farther away.
Seedlings grown at home do not develop the root mass or thickened stems like their commercially grown cousins; hardening off will take longer. One week before hardening off plants outdoors, cut back on their watering, stop fertilizing and reduce room temperature.
Ten days before planting in the garden, place plants in a bright location out of direct sunlight and wind for 2-3 hours being sure to check watering. Over the next several days gradually increase plants exposure to sunlight, wind and temperature variations. Leave plants outdoors overnight of the last two days.
I like to transplant late in the day when the sun is lower in the sky and not as hot. The leaves will have time to dry before nightfall, and because plants take up most of their water at night, they will be more able to tolerate the heat of the coming day.
Copyright 2015, Margaret Rose Realy, Obl. OSB
(Image by Grandpa, courtesy shutterstock.com.)
About the Author

Comments