Last week, I wrote about creating my master list, which not only helped me to get more organized, but also revitalized my excitement for all the projects I'd taken on. As I worked, a few key guidelines emerged, so this week, I thought I'd share them in the hope of making the process of creating a master list a bit less daunting for you.
Tap into your existing plan. Despite the fact that I have a system for keeping track of my to-dos -- one that's meant to avoid little slips of paper scattered everywhere -- I end up using those annoying little slips of paper when I'm away from my designated lists. Consequently, the first step was putting those scattered ideas (which tend to fall into particular categories) where they belong. For school-related to-dos, I use a steno pad with a separate column dedicated to each class. TED Talks go into a dedicated a two-page spread (with room to grow) in my Brainstorm Book, so I can keep track of the ones I love, along with those "I think I might use sometime" for class. Finally, I keep track of daily, run-of-the-mill to-dos in a spiral-bound notebook (when I'm on the go) and/or my page-a-day desk calendar (when I'm at home)...or in the classic I need to see it piles I can't seem to stop making. Admittedly, this last part needs some work.
 Via Pixabay (2014), CC0 Public Domain
Trust your styles. Why don't I just make one long list? Because it stresses me out. Partway through this process, as I closed window after window and organized my lists in a way that made sense to me, I began to feel energized. My default (all those open windows and reminder piles) had gotten out of hand, and was more visually stressful than visually helpful. By putting ideas where they belonged based on my existing system, I was filing my to-dos, and, by putting them in places that made sense to me, I also increased the likelihood that they'd get done. Filing things visibly (i.e. on lists), allowed me to categorize them but still keep them accessible. One of the best things I came up with was the master list of all the links I wanted to get back to. Simple and functional, it let me put everything in one location and close all those open windows on my browser. Even better, I kept my newly organized browser tidy for several weeks...until the next project took over. But, because I remember the feeling of relief inspired by having only one or two sites open, I know those open windows won't stay open for long.
Stay focused. While creating that wonderful a master list of links, it was tempting to just curl up and read all the good stuff I'd found as I closed browser windows, but that wasn't what I was supposed to be doing. If they'd gone unread long enough to linger, they could wait a little longer.
Finally, don't forget to finish what you started. The day I started this project, I had an appointment, which created a built-in deadline. The ticking clock added an undesirable layer of stress, making it tempting to stop before every last paper was put into its file just so I could eliminate the pressure. In retrospect, that might actually have been a good thing. Knowing that if I didn't finish before I left for my engagement I'd have to face an unfinished mess when I came back motivated me to keep going so I could come home and not only relax, but celebrate my mind-freeing organization.
And the icing on the cake? Going through this process inspired three blog posts. And, the next morning, I knew just where to go when I wanted to work on one of my articles.
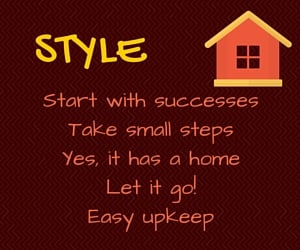
Functional organization, built on what comes naturally. Gotta love STYLE.
Copyright 2016 Lisa Hess
About the Author

Lisa Hess
Transplanted Jersey girl Lisa Lawmaster Hess is the author of a blog compilation, three novels, and three non-fiction books, including the award-winning Know Thyself: The Imperfectionist’s Guide to Sorting Your Stuff. A retired elementary school counselor, Lisa is an adjunct professor of psychology at York College of Pennsylvania. She blogs at The Porch Swing Chronicles, Organizing by STYLE, and here at Catholicmom.com. Read all articles by Lisa Hess.


.png?width=1806&height=731&name=CatholicMom_hcfm_logo1_pos_871c_2728c%20(002).png)
Comments